In this video tutorial I’ll show you how you can use Lab color mode in Photoshop to quickly, easily and drastically change the color and contrast in your images and really make them pop.
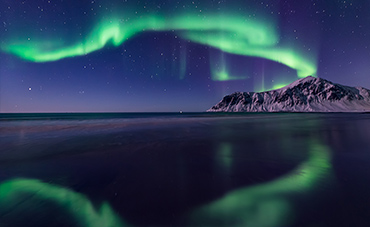
First off a big thanks to my friend Nagesh Mahadev for letting me demo these techniques one one of his amazing images. Be sure to check out his work on his 500px page and his Facebook page. The ‘before’ image can be seen below, and while it’s a great image to begin with, I wanted to add more contrast to the mountain and add further separation to the huge array of colours that exist here. Lab mode proved to be a perfect way to do this.

The ‘after’ image with just a few minutes of curves adjustments in Lab mode can be seen below. The video goes into detail about the specific adjustments that were done and how you can integrate Lab colour mode into your existing RGB workflow.

Lab color mode has been available since Photoshop 3.0 so all the techniques covered here will work with just about any version of Photoshop that you have.
Thanks for watching and don’t forget to subscribe to my YouTube channel for more updates!