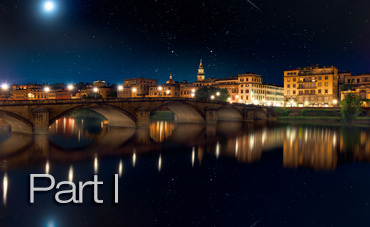
In this first of a two part video tutorial, I’ll taking you through a full edit of a night time cityscape and cover a number of color adjustment, masking and compositing techniques along the way.

We’ll be working with a number of relatively basic tools to build up this image, most of which are available from Photoshop CS3 and onward. In this first part we’ll be extending the dynamic range, doing some basic colour adjustments and compositing in our sky, moon and shooting star. In part two we’ll be adding reflections, balancing out the foreground colour, dodging and burning, adding haze, and finishing off the image with some selective sharpening. The progression can be seen in the image above.
The gear and settings for this image were as follows:
Camera: Nikon D800
Lenses: Nikon 24-70mm f2.8, Nikon 14-24mm f2.8 (for sky)
Base Exposure: ISO200, f/7, 8 seconds, 28mm
Exposure for shadows: ISO200, f/7, 15 seconds, 28mm
Exposure for the sky: ISO400, f/2.8, 30 seconds, 14mm
Exposure for moon: ISO200, f/7, 1.3 seconds, 36mm
As you’ll see in the video, 4 images were used to composite the final photo. The Base exposure had the blacks slider reduced to -40 and contrast increased to +15 in Lightroom before being brought into Photoshop.
Part two of this tutorial can be found here.
Thanks for watching and don’t forget to subscribe to my YouTube channel for more updates!